
-
-
Download the stable release from https://www.marginallyclever.com/product...
-
The pricing is optional. You can choose a price of $0. Your generosity helps us make it great.
-
The download link will appear on the checkout page...
-
...and in your order confirmation email.
-
-
-
If you are on Windows, please make sure you already have the drivers for the RUMBA board from https://reprap.org/wiki/RUMBA#RUMBA_USB_...
-
-
-
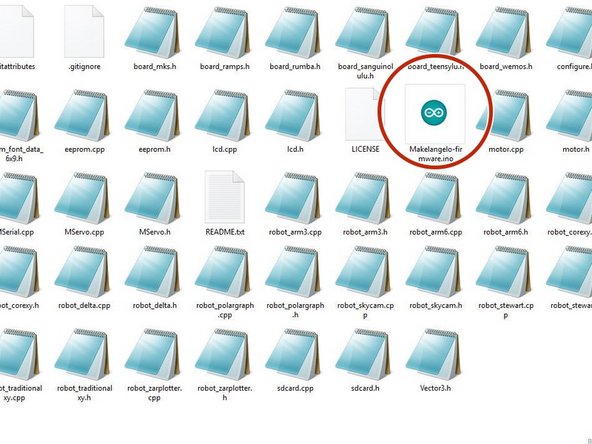
Extract the zip file downloaded from the link into a folder called Makelangelo-firmware. Double check the exact spelling, including the hyphen -.
-
Go into the folder and open Makelangelo-firmware.ino with the Arduino app.
-
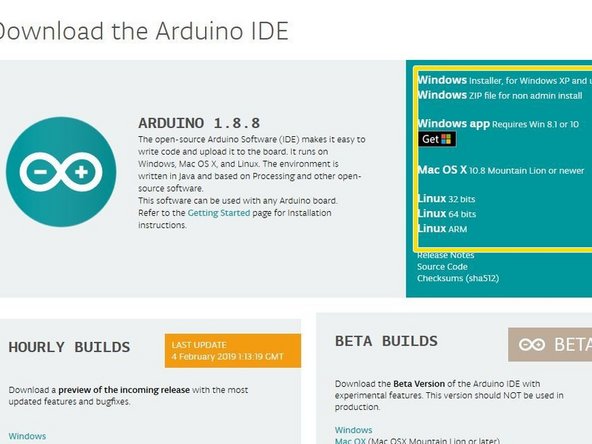
The Arduino app is available from https://www.arduino.cc/en/Main/Software
-
You may be asked to update some features of Arduino. Please follow the prompts and get up to date.
-
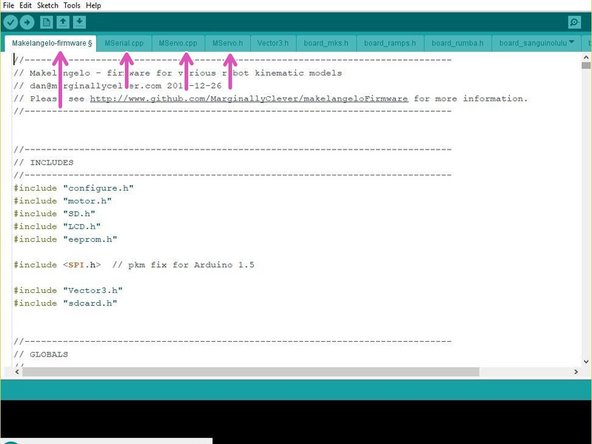
You should see many tabs at the top of the app. If you have only one tab then Arduino has created that folder and moved the ino file into the folder. Quit Arduino, move the rest of the files into the new folder, and re-open the file.
-
-
-
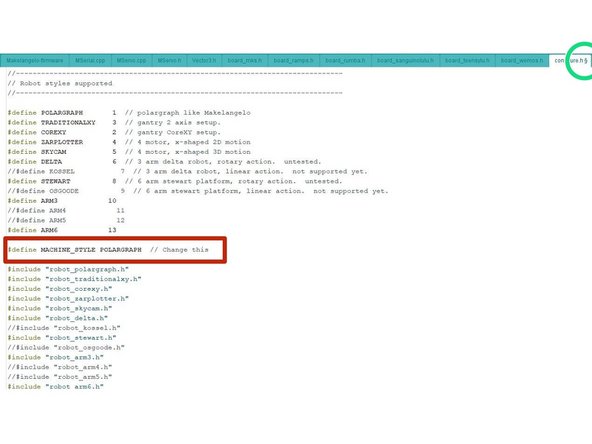
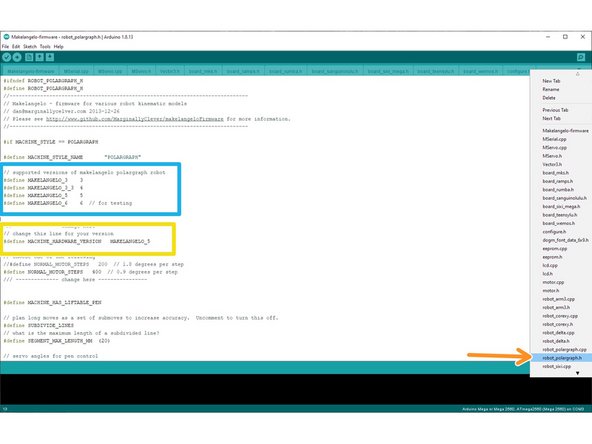
Confirm that in the tab configure.h, the line reads #define MACHINE_STYLE POLARGRAPH. This firmware runs on many styles of robots and this sets the correct style.
-
You can find more tabs in the drop down on the right
-
Confirm that in the robot_polargraph.h tab your machine hardware version is selected. For example,
-
#define MACHINE_HARDWARE_VERSION MAKELANGELO_5 for version 5.
-
#define MACHINE_HARDWARE_VERSION MAKELANGELO_3 for version 3.
-
etc. The list of availble options appears immediately above it in the same file.
-
-
-
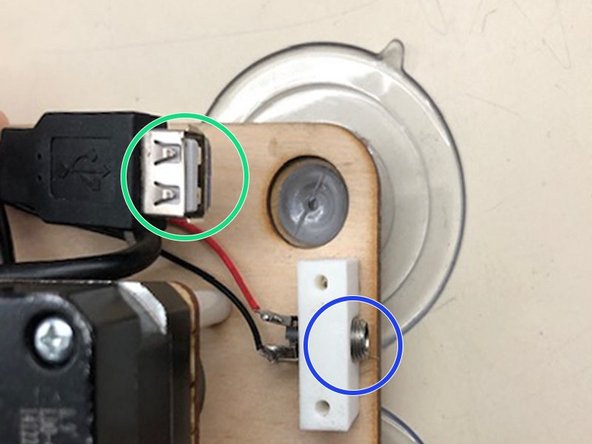
Connect the USB from your computer to your robot.
-
Connect the 12v2a power supply to your robot.
-
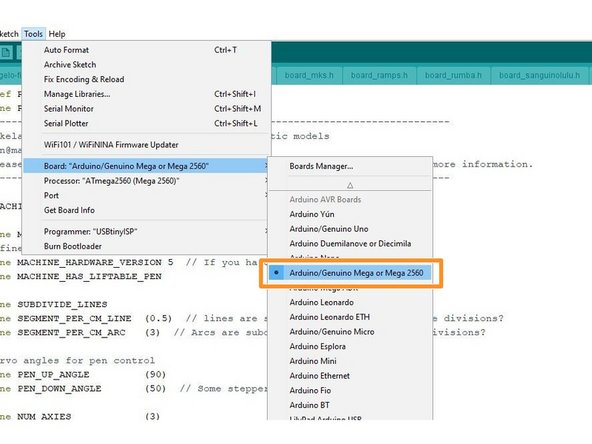
In Arduino, set Tools > Board to Mega 2560
-
set Tools > Port to the port that says Mega 2560. This name is slightly different for OSX and Linux users.
-
If you do not see any com port, don't panic. Read the next step.
-
-
-
If you already see the COM port, you can ignore this step.
-
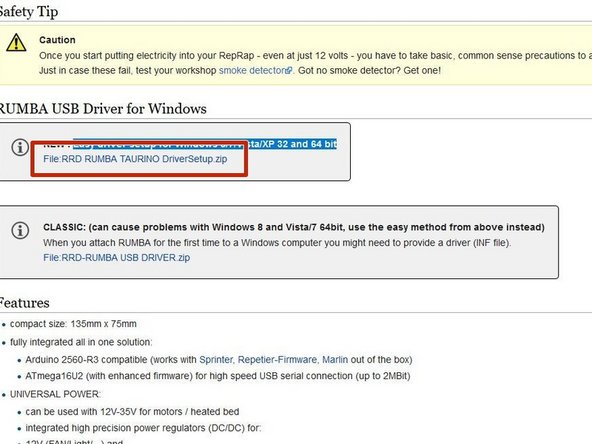
You may be missing the drivers, which can be downloaded from https://reprap.org/wiki/RUMBA#RUMBA_USB_... . The recomended method is the Easy driver setup for Windows 8/7/Vista/XP 32 and 64 bit
-
After driver installation if you still don't see the COM port, try rebooting your PC.
-
Suddenly disconnecting power while your PC is talking to your robot scares Windows. It will hide the COM port until after a reboot as a precaution.
-
-
-
Connect your robot when power is on and open a terminal in your computer.
-
Type "ls /dev/tty*" without quotes and hit enter. you should see at least one device, typically /dev/ttyACM0.
-
Often, the command to use is "sudo chmod 666 /dev/ttyACM0". You will need to know the root password to perform this command.
-
restart your java app and try to connect again.
-
-
-
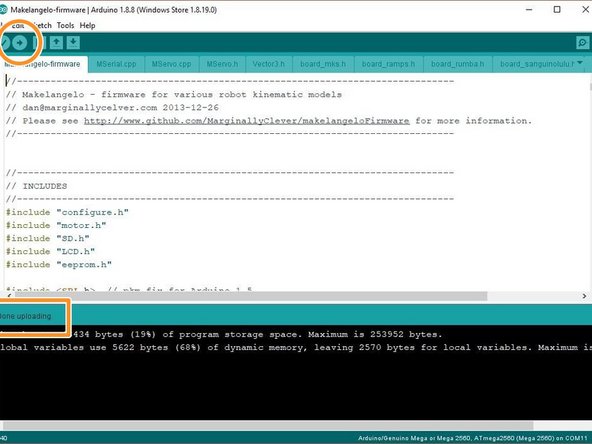
Click the upload button. The app will say "Compiling..." and then "Uploading..."
-
When finished OK, it will say Done uploading.
-
For all other results, please copy all the text in the orange text in the fail message and post it to our support forums at https://www.marginallyclever.com/forums/...
-
-
-
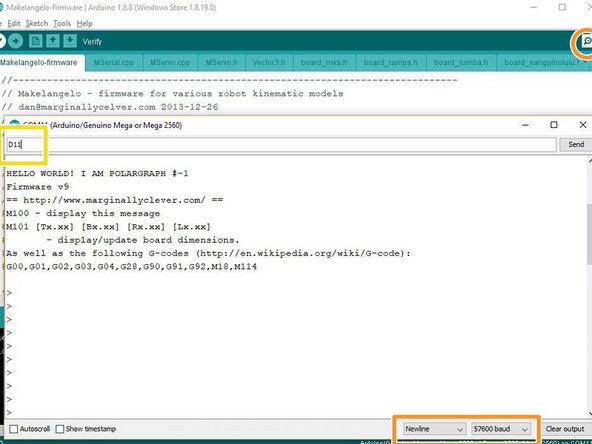
Click the Serial Window icon in the top right (looks like a magnifying glass)
-
Confirm the dropdowns says newline and 57600 baud. HELLO WORLD! text should appear in the window.
-
In the text field at the top type D11 (uppercase) and hit enter or click Send. The status window should say Saving dimensions. Saving calibration. Saving home.
-
-
-
Some older Makelangelos had motors with 400 steps per turn (0.9deg/step). Newer machines have 200 step per turn.
-
in robot_polargraph.h, look for the lines that define NORMAL_MOTOR_STEPS. the double slash (//) blocks one line, and so the machine thinks it has 400 step motors when it doesn't. Move the // to the other line and upload again.
-
You may also find your machine moves half the distance it should. then you have a 400 machine and the firmware is set to 200. Do the reverse.
-


Congratulations! You are done. The robot is now up to date and should talk to the latest Makelangelo Software.
Congratulations! You are done. The robot is now up to date and should talk to the latest Makelangelo Software.
Cancel: I did not complete this guide.
2 other people completed this guide.
