
Introduction
This guide will show you the hardware and software upgrades needed to convert a Makelangelo 5 to a Makelangelo HUGE. Once you're done you'll be able to draw as before but now bigger than ever!
Tools
Parts
No parts specified.
-
-
Makelangelo HUGE is 1366mm wide and 2m tall. Some assembly will be needed to convert M5 to HUGE. An M3 hex head screwdriver will be needed.
-
Some cables will need extensions for the HUGE size. These are included in the upgrade kit.
-
The assembled belt need to be replaced with the belts for the HUGE.
-
The firmware code in the robot's brain needs to be adjusted to compensate for the new size. Makelangelo Software can make this change.
-
-
-
Locate the HUGE extension board.
-
Locate the bag labelled HUGE. The bag should contain:
-
Two 2m belts
-
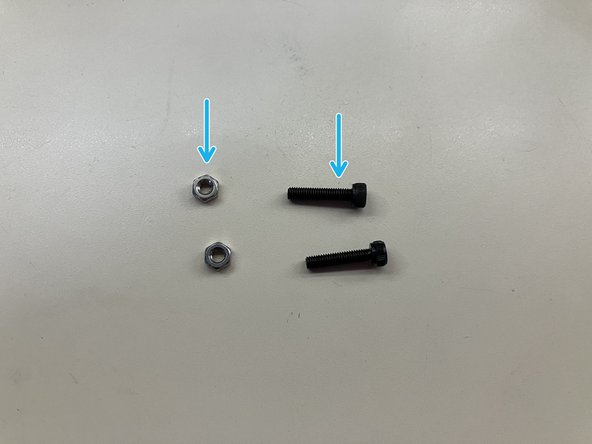
Two M3x10 screws and two M3 nylock nuts
-
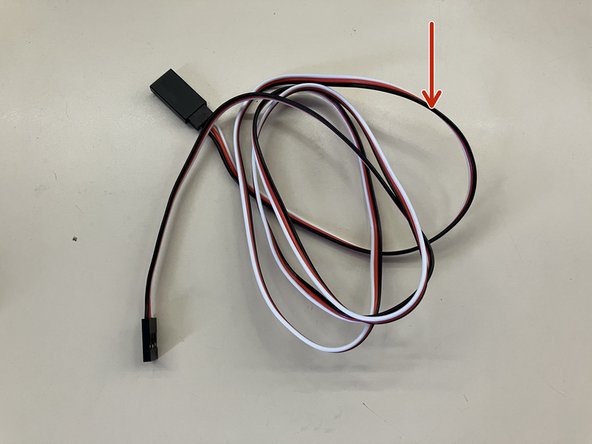
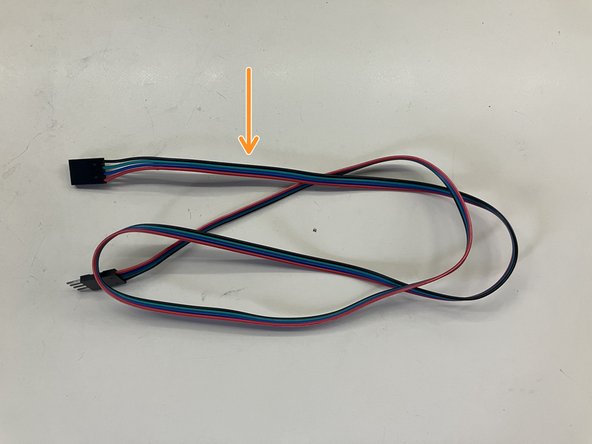
one 4-wire stepper extender, and
-
two 3-wire extenders.
-
-
-
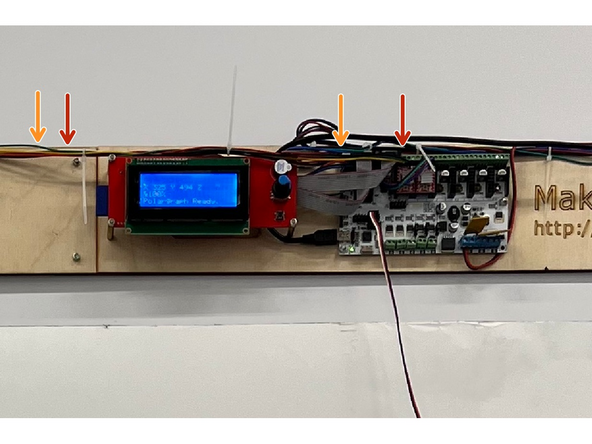
There are two cables from the left side motor. A 4-wire stepper motor cable...
-
and a 3 wire limit switch cable.
-
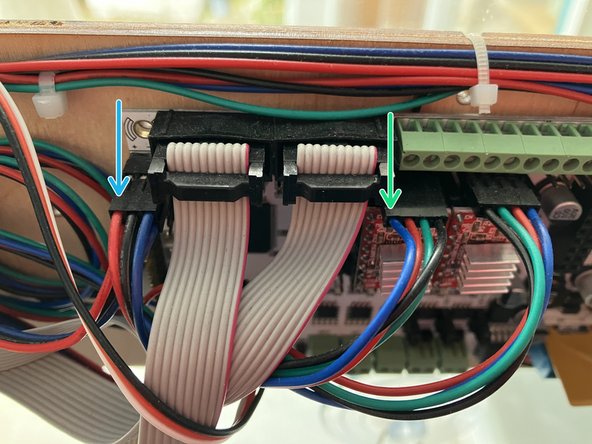
Follow these wires back to the control board. Take a picture of how they are connected for reference.
-
Notice the 4 wire cable is connected to the left stepper. Make a note of the colors and their orientation. The extension cables might not be a perfect color match and we don't want to reconnect them backwards.
-
Notice the left limit switch cable is connected to the X- pin. Again, take note of the color and orientation.
-
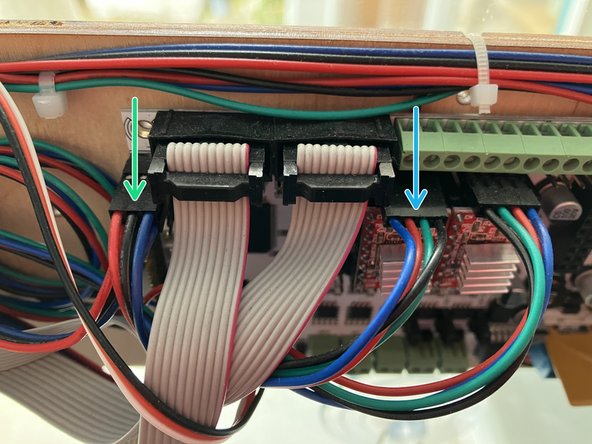
With power off, gently disconnect the limit switch cable and the stepper motor cable. Pull straight out from the board. Pull from the black connector, not the wire.
-
-
-
Locate the M3 screws and nuts in your HUGE upgrade kit.
-
Using an M3 alan key (hex key), undo the screws that hold the left and right sides together. A Torx T10 will also work.
-
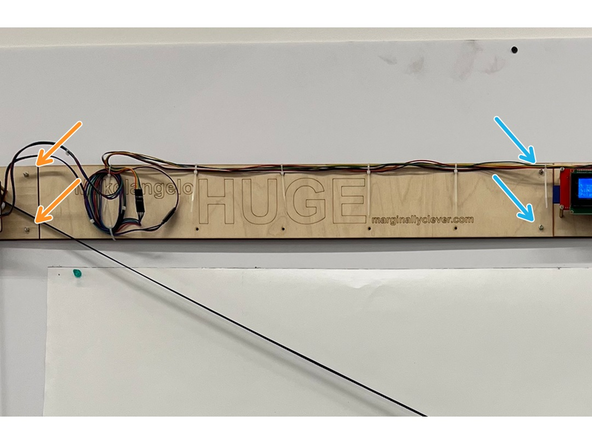
Add the extension bar and fasten with the provided screws and nuts.
-
Use the provided screws in the HUGE kit to fasten the left side motor to the other end of the extension bar.
-
It can help to have a friend hold the machine while you fasten the screws. Another way is to flip it length-wise so that you can access it from both sides while it rests on the limit switches.
-
-
-
By default the M5 comes with 1m timing belt pre-assembled for ease of use. The upgrade kit comes with 2m belts.
-
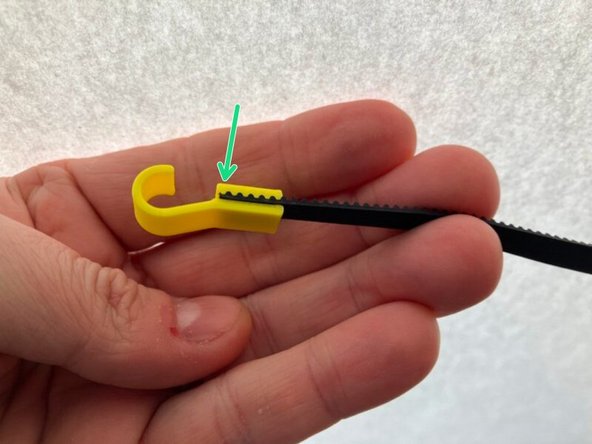
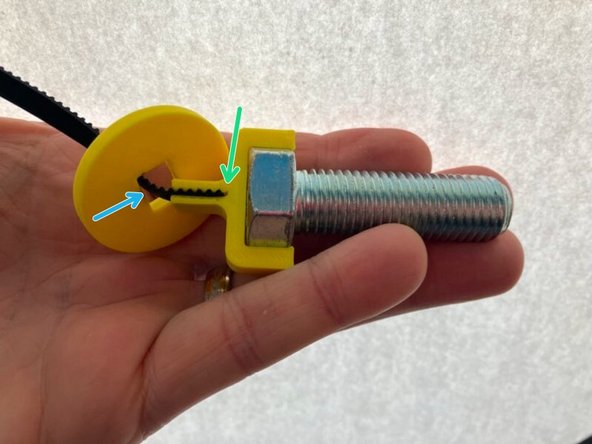
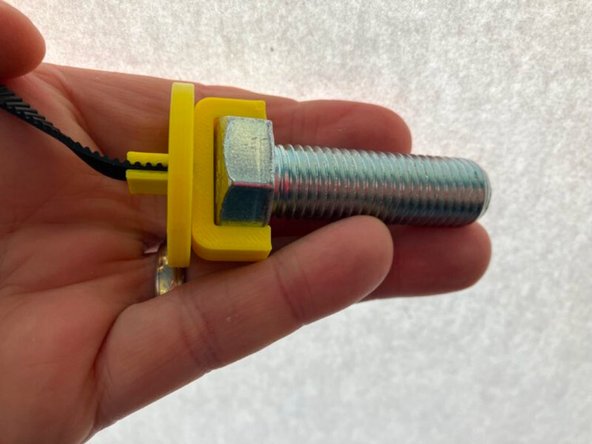
Take careful note of the position of each belt in their connectors and match the fit for best performance (square drawings free of curvature).
-
If you have an older model disc, the hole will be larger than the Y clip. The disc has a rectangular hole. Make sure the long/wide side of the rectangle is touching the belt to ensure a snug fit. Try to center the hole on the hook.
-
If you have a newer model disc, the fit should only work one way.
-
-
-
On the left hand side of the robot there are two cables: from the limit switch (3 wires)...
-
...and one from the stepper motor (4 wires).
-
Connect the limit switch wire to the X- limit switch pin with ONE extension cable. Note the red wire from the limit switch is on the left. Make sure your extension cable does not reverse this connection or the robot may not turn on.
-
Using your previous notes, connect the stepper motor wire to the left stepper driver with an extension cable. Note the blue wire from the stepper is on the left. Make sure your extension cable does not reverse this connection or the motor will turn backwards.
-
There will be more 3 wire extension cables left. Connect them all in a line to the pen holder, making sure to match the colors. The pen holder wire is yellow brown red. connect the red wire of the pen holder to the black wire of the extension.
-
-
-
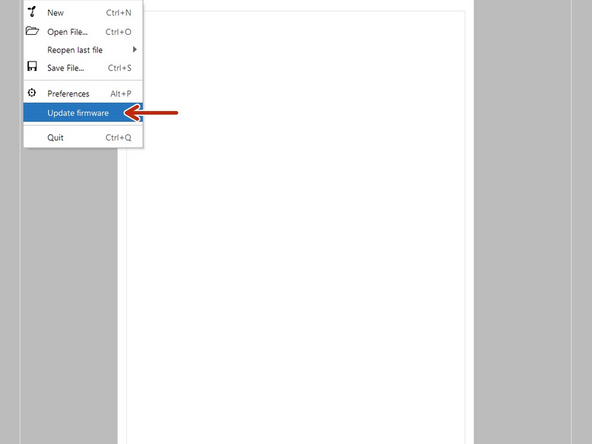
By default all Makelangelos are tested as 5s. The latest edition of Makelangelo Software includes an upgrade tool. It is located under File > Update firmware
-
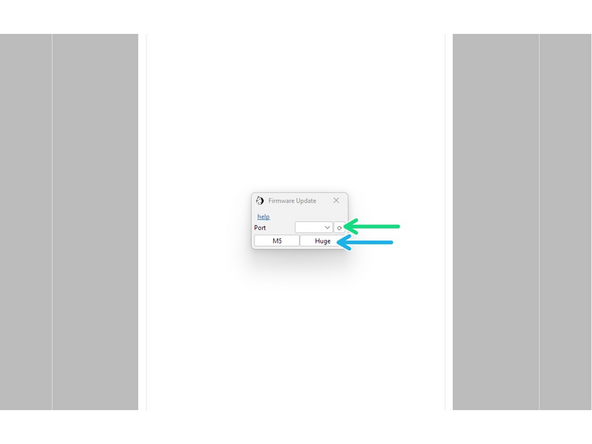
Connect the USB cable to the robot on the left side of the motherboard. Turn on power. Click the ⟳ button to the right of port. A COM port should appear in the dropdown box. If it does not then the USB is not connected or the machine has no power.
-
Press HUGE. The application should take about 60 seconds to upload the firmware.
-
If it immediately says "finished", something has failed. Please contact us for more help. (OSX are known to have security issues here.)
-
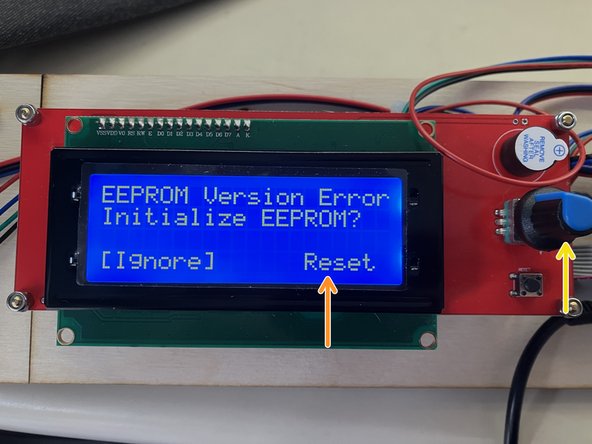
After successful upload the LCD panel will probably say there is an EEPROM change. Turn the blue dial until the screen says [Reset]
-
Accept the change by pressing in on the blue dial.
-
Confirm the change has been applied. Click the dial, navigate to Configuration > Advanced Settings, and verify that Draw Min X is -683, Draw MinY is -1000, and Belt length is 2035.
-
-
-
Start Makelangelo software.
-
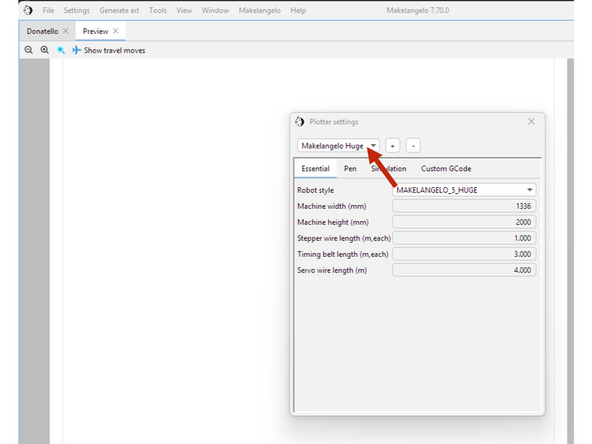
Change the machine size to HUGE. Settings > Plotter settings > Makelangelo HUGE. This is purely visual, it does not affect output.
-
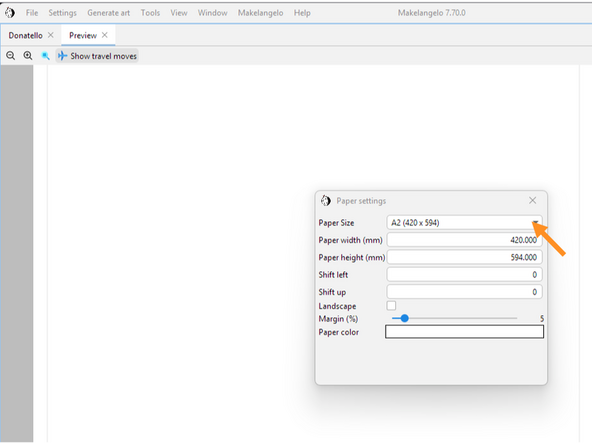
Change the paper size to A2. Settings > Paper settings > A2 and the orientation should be in portrait mode (landscape should not be checked)
-
Generate art > Outline paper
-
Makelangelo > Save Gcode to File/SD. Save to your SD card as "A2"
-
Put the SD card in the robot, turn it on, and turn/press the dial to select Print from Media > A2
-
The machine should now home, wait for you to click the dial (indicating you are ready to proceed) and then draw an A2 rectangle in portrait mode.
-
If your rectangle is top-heavy, you may have forgotten to reset the EEPROM. Choose Configuration > Advanced settings > Initialize EEPROM and draw again. If problems persist, contact us.
-

Congratulations! Your HUGE is now physically ready to draw. You will probably want to also make a firmware update, assemble your pen holder, and start using the software.
Congratulations! Your HUGE is now physically ready to draw. You will probably want to also make a firmware update, assemble your pen holder, and start using the software.
