Introduction
You will also need a small phillips (x head) screwdriver.
Tools
Parts
No parts specified.
-
-
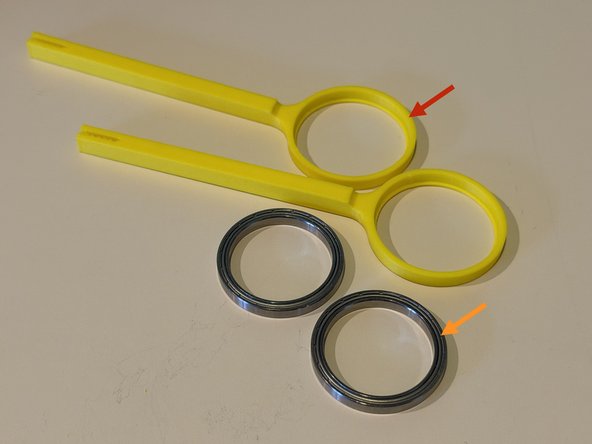
Locate the arms. They are identical. Notice the inside of the ring has a lip which should be on the bottom.
-
Locate the bearings. They are identical. One bearing should be pressed into each arm.
-
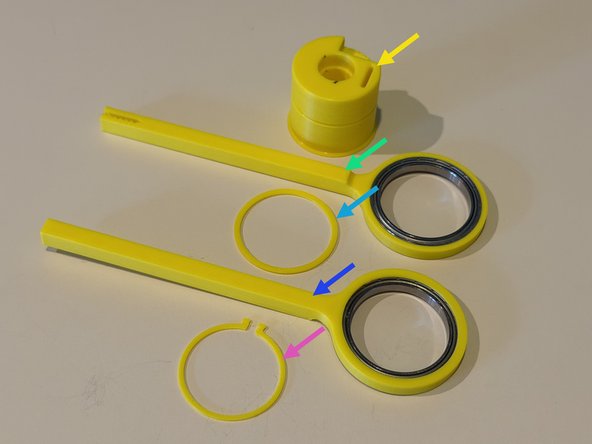
Locate the body. I also has a lip that should be on the bottom.
-
Press the first arm, lip-down, onto the body. This will be the left arm.
-
fit the bearing spacer onto the body. The spacer is a continuous ring.
-
Do not confuse the spacer with the circlip, which is open on one side. The circlip will be used in a later step.
-
Press the second arm, lip-up, onto the body. This will be the right arm.
-
-
-
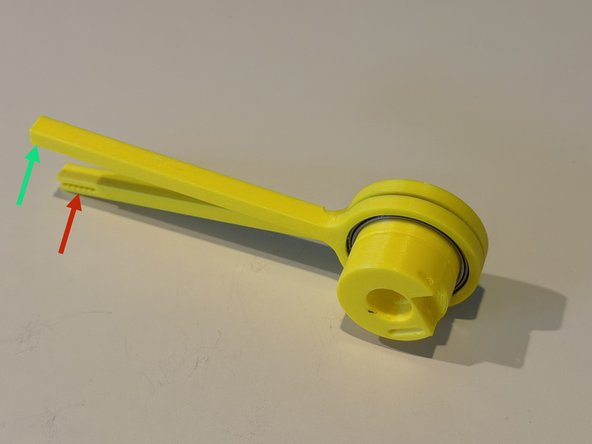
Before proceeding, make sure the arms are in the correct orientation.
-
Notice how the arms cannot swing past each other.
-
The groove at the end of the left arm should be visible from this angle.
-
The groove of the right arm should not.
-
-
-
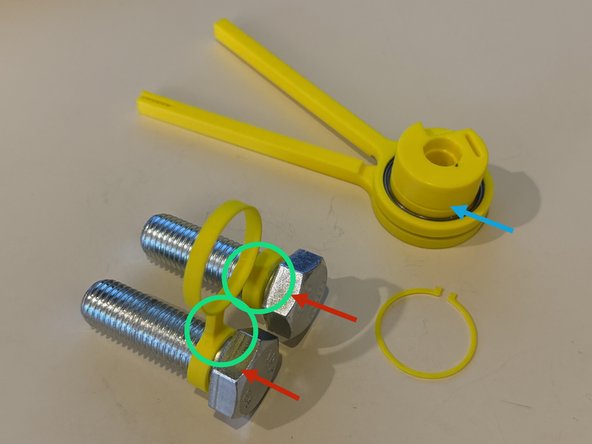
Notice the mouse ears are slightly taller on one side.
-
Screw the large bolts into the mouse ears such that the bolt heads are on the tall side of the mouse ears.
-
Notice the groove around the center of the body.
-
Press the mouse ears onto the body. When lying on a flat surface the ears will not go all the way down. It is necessary to pick up the assembly and squeeze a bit to finish the job.
-
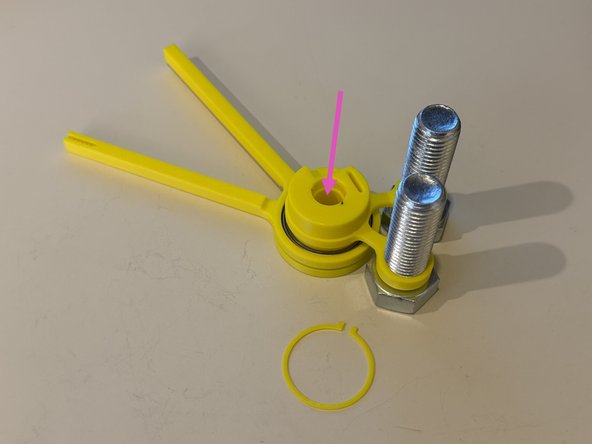
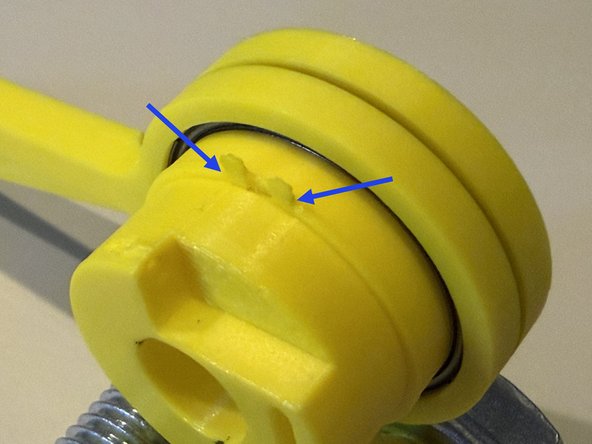
Fit the circlip over the body and into the groove. It is important to get the clip into the groove such that the clip is flush with the mouse ears. Only the tabs at the end of the clip should protrude.
-
-
-
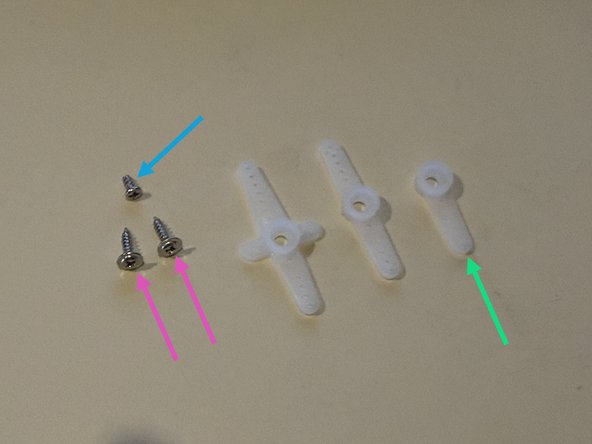
The servo package includes two identical largers screws.
-
The servo package includes one smaller screw.
-
The servo package include several servo horns.
-
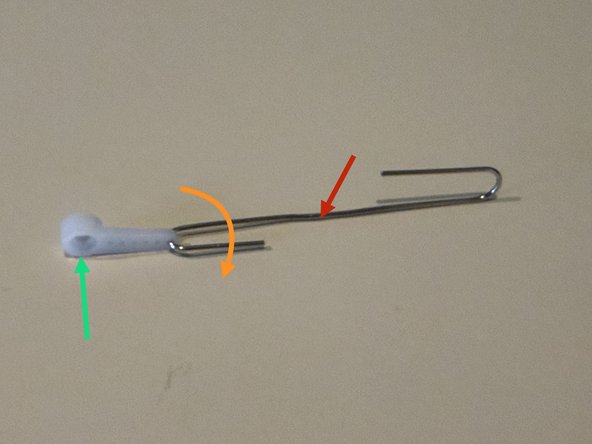
Unbend a paperclip from the center.
-
Twist the paperclip 1/4 turn (90 degrees) clockwise.
-
Fit the servo horn onto the end of the paperclip. Notice to the direction of the horn.
-
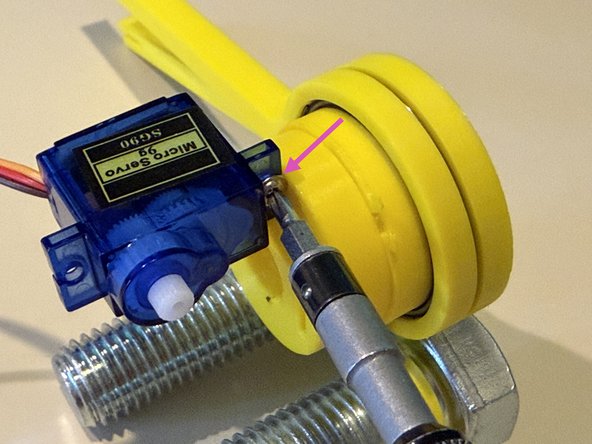
Use a phillips screwdriver (x head) to attach the servo to the body with one of the larger screws. Tighten until the servo is no longer loose.
-
Do not overtighten or you might strip the plastic.
-
-
-
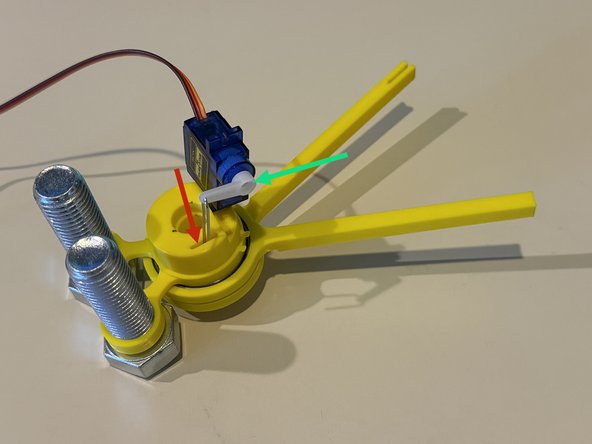
Insert one end of the paperclip into the body slot.
-
Press the servo horn onto the servo gear at a right angle to the body of the servo. This is an educated guess that might be tweaked later.
-
The smaller screw can be added here to secure the horn. Probably best to save it until after you have run the machine at least once and confirmed the horn angle is correct.
-
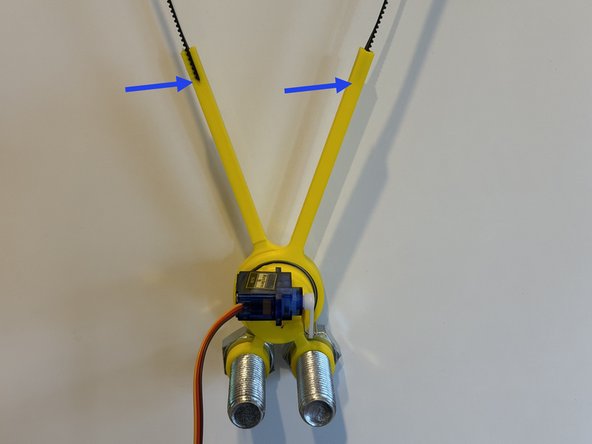
Press the end of the timing belt into each arm. Use as many groove teeth as you can. There may be a small gap at the end for fit - less than one tooth is best.
-
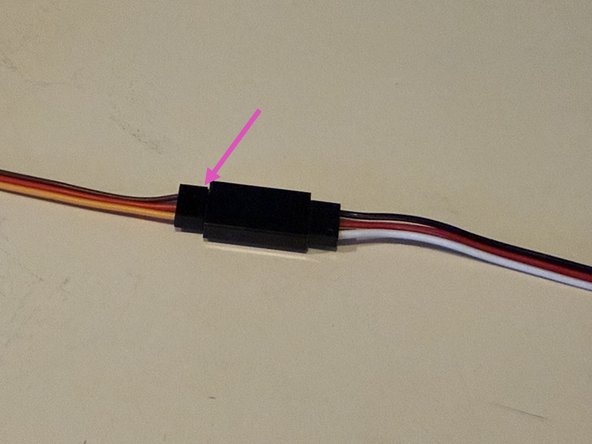
Attach the servo wire to the extension cable. Be careful to match the colors in the image: light to light, dark to dark.
-
Congratulations! You're ready to mount this pen holder on your plotter.
Congratulations! You're ready to mount this pen holder on your plotter.
