
Introduction
How to fly around the 3D world, switch cameras. How to pick, move, and rotate items.
-
-
The 3D View can be found via the Windows menu. The keyboard shortcut is Shift+F1
-
3D View may be open already in a tab. Look for the matching tab name.
-
Change active camera in the Scene with the 3D view > camera selector. There is always a default Camera 1
-
Render: Activate render passes. Each render pass draws one type of thing the camera might see in the 3D view. They can be set to Never, Sometimes, or Always.
-
Copy to Scene: Makes a copy of the active camera and adds it to the root of the Scene. Here a camera has been added and renamed by the user.
-
-
-
Toggle Select
-
...then double click items in the scene.
-
The selection change will affect several tabs.
-
Toggle Move and the move gizmo will appear at the center of the selected item. If you have many things selected it will appear at the center of the last item.
-
Click and drag the spheres to move in a straight line. Click and drag the squares to drag in the plane.
-
Toggle Rotate to get the rotate gizmo. Click and drag the boxes to rotate. The white lines snap to 5, 10, and 45 degrees.
-
Click the globe to change the frame of reference. The two frames available are World (globe) and Local (eye). Local is the frame of reference of the last selected item.
-
-
-
Pan and tilt: Drag the mouse while holding the middle mouse button.
-
Dolly: Drag the mouse while holding the middle mouse button and SHIFT.
-
Pedestal and Truck: Drag the mouse while holding the right mouse button and SHIFT.
-
Orbit: Drag the mouse while holding the right mouse button. Change the orbit distance by rolling the mouse wheel.
-
As you get closer to the orbit point your movements will be come smaller.
-
You can also adjust the mouse sensitivity in File >Settings > Viewport
-
-
-
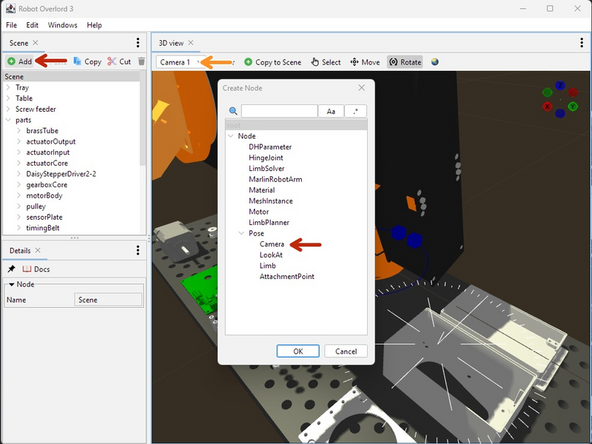
Did you know? You can see one camera from another. Add a second camera and try it!
-
Make sure Render > Cameras is set to Always or else the cameras will be invisible.
-
Use the Scene > Add > Pose > Camera. The new camera will appear in the Scene graph under the selected nodes. A ray coming out of the camera shows the relationship between your cursor and the 3D world.
-
In 3D View, select the new Camera. The view will now draw from the new point of view.
-
Move one camera until it is pointing at the other camera.
-
-
-
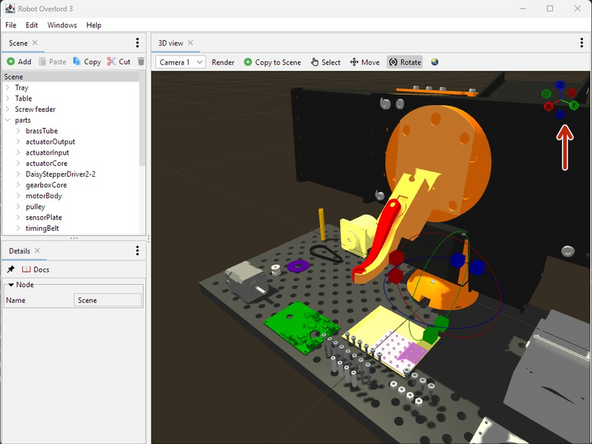
The Compass appears in the top right of the view.
-
The handles with letters are the positive direction of each axis. The handles without are the negative.
-
Hover the cursor over the compass and the background will change. Hover the cursor over a handle. The letter will appear in white.
-
Click the mouse on each handle to make the camera orbit to face that direction.
-


Now that you have installed and run the app,
Now that you have installed and run the app,
