Difficulty
Moderate
Steps
8
Time Required

In Progress
This guide is currently being written. Reload periodically to see the latest changes.

Private
This guide will not appear in search results and can only be viewed by team members!
Quiz
0
-
-
[3D] Electronic Case Package
-
Electronics
-
Alan Keys
-
Flat Screw Driver
-
Needle Nose Pliers
-
Multimeter
-
Ferrule Crimper (optional)
-
-
-
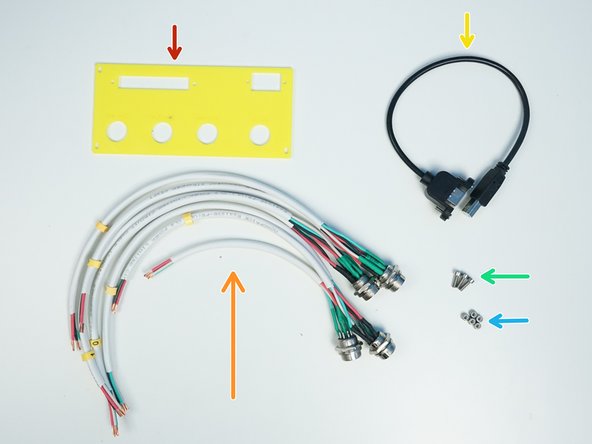
Prepare the following components:
-
Machined Case
-
[3D] Case Wall Adapter
-
GX16 Aviation Plug Male (wire assembled and numbered)
-
USB-B (M/F) Extension
-
M3x10mm Screws (x3)
-
M3 Nylock Nuts (x5)
-
-
-
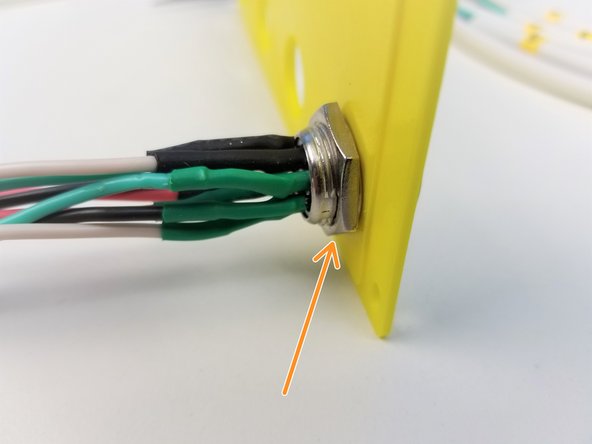
Unscrew the Wall Mount Nuts from each connectors
-
Each Connectors have 2 sets of 4pin wires soldered in this specific manner [PIC of wires to pin of the plugs]
-
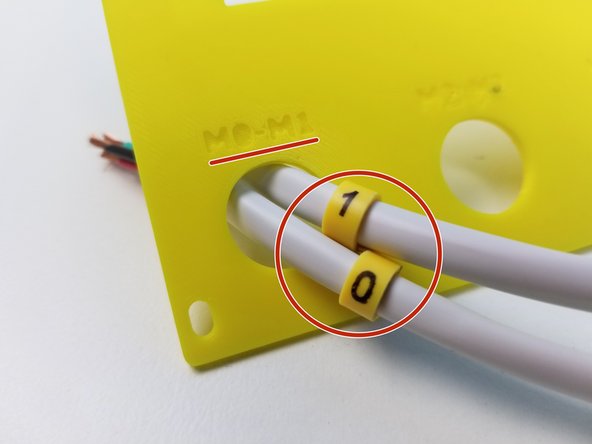
The wires are cut to length as follows:
-
0 & 1 = 315mm & 315mm respectively
-
2 & 3 = x mm & xmm respectively
-
4 & 5 = x mm & xmm respectively
-
Not Labelled = Tool --> x mm
-
-
-
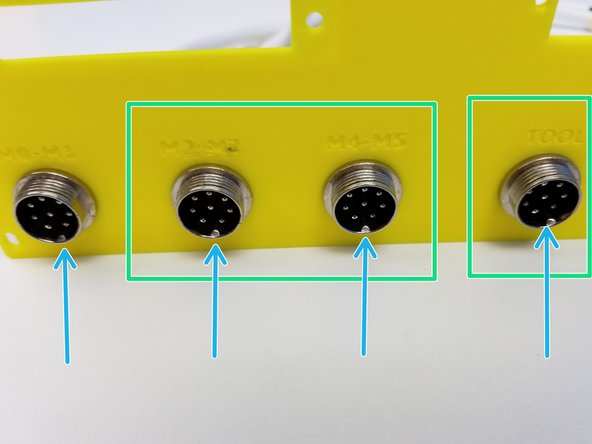
Feed the connectors through the wall adapter as labelled.
-
Tighten the Mounting nut that was unscrewed from the previous step back to the connector
-
Repeat the same process with the rest of the connectors
-
Be sure to align the alignment set on the plug to be in the bottom center
-
-
-
Prepare the following components:
-
24V-20A Power Supply
-
[LSR] Acrylic PSU Mounting Plate
-
Rocker Switch
-
M4x14mm Screws (x6)
-
M4 Hex Nuts (x8)
-
M4 Square Nuts (x2)
-
-
-
Prepare following
-
Arduino Mega
-
[3D] Arduino Standoffs and Tray
-
Motor Signal cables (already assembled to length)
-
M3x10mm Screws (x4)
-
M3x16mm Screws (x5)
-
M3 Hex Nuts (x2)
-
M3 Nylock Nuts (x2)
-
-
-
Prepare the following components:
-
Stepper Drivers
-
[3D] Stepper Driver Adapters
-
M3x10mm Screws (x12)
-
M3x8mm Screws (x9)
-
M3 Nylock Nuts (x12)
-
-
-
Prepare the following components:
-
Screw Terminal Blocks from the Drivers
-
2-pin Power Wires 18AWG (10cm)
-
2 pin Power Wires 18AWG 15cm
-
2 pin Power Wires 22AWG 15cm (x2)
-
22 AWG solid Wires Black 3cm (x6)
-
[Opt] - Ferrule Crimp Pins (x4)
-
![[3D] Electronic Case Package](https://d3t0tbmlie281e.cloudfront.net/igi/mcr/cbVbsoyjK53cHYlG.medium)

![Each Connectors have 2 sets of 4pin wires soldered in this specific manner [PIC of wires to pin of the plugs]](https://d3t0tbmlie281e.cloudfront.net/igi/mcr/1ZG5iiDmKOEMDDdg.medium)