Parts
No parts specified.
-
-
Locate the mounting plate
-
The servo
-
The one arm servo horn
-
The servo horn screw
-
Two servo mounting screws
-
The servo parts should all be in the same bag as the servo, along with a few horns that we do not use.
-
-
-
Attach the servo to an Arduino and drive the output gear to 90 degrees.
-
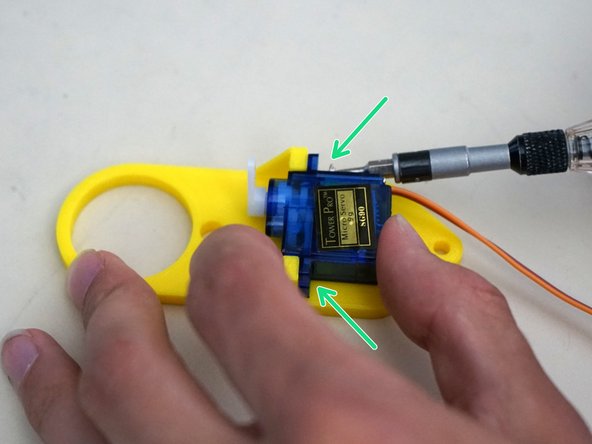
Press the one arm servo horn on to the output gear perpendicular to the servo body.
-
Use a Phillips (x) screwdriver to attach the servo horn onto the servo output gear with the two servo horn screws.
-
Using the Arduino, drive the servo to 50 degrees and check that it does not hit the mounting frame.
-
Disconnect the servo, then gently press the horn down towards the body for safe storage in shipping.
-
Note the horn screw, not seen in previous picture.
-
-
-
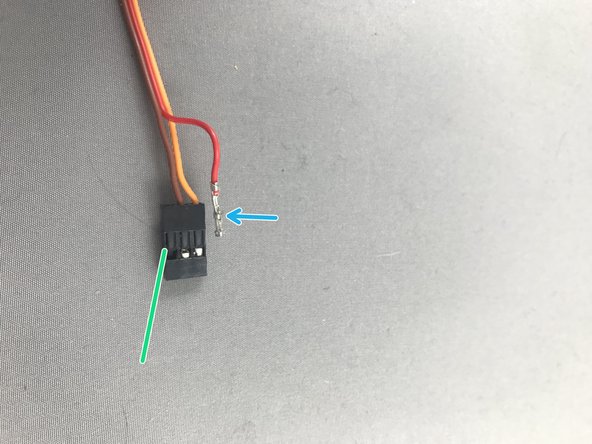
Servo cables must be in this order: Orange, Brown, Red. Always check the position of servo cables before running Makelangelo!
-
While gently pulling on the red wire, slide a sewing pin under the hook of the black JST header to carefully lift and release the crimp pin. When you get it right the crimp pin will slide out. Lifting too hard can break the hook so be gentle!
-
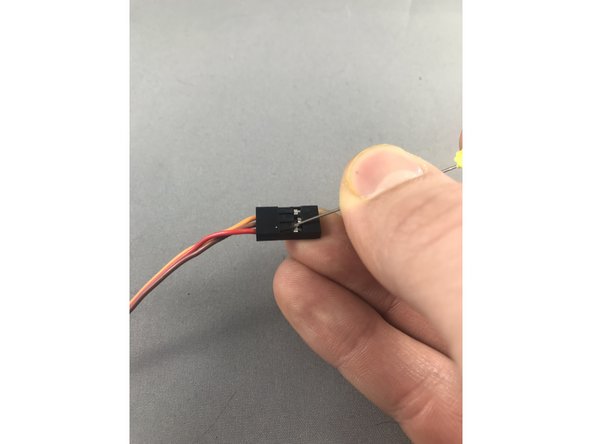
Note which side is up on the pin - there is a tong that catches on the hook.
-
Once both crimp pins are released, reinsert them with the new order. Be sure to keep the tong on the up side to catch on the hook.
-
-
-
Gather the mounting plate with servo
-
The center tube
-
the two arms
-
the retainer ring
-
the four arm clips
-
Flip the arm clips so that they form two matched pairs. Pay close attention to the direction of the q-p holes in the top of each clip.
-
-
-
Gather the tensioner body
-
The tensioner assist
-
The M4 hex nut
-
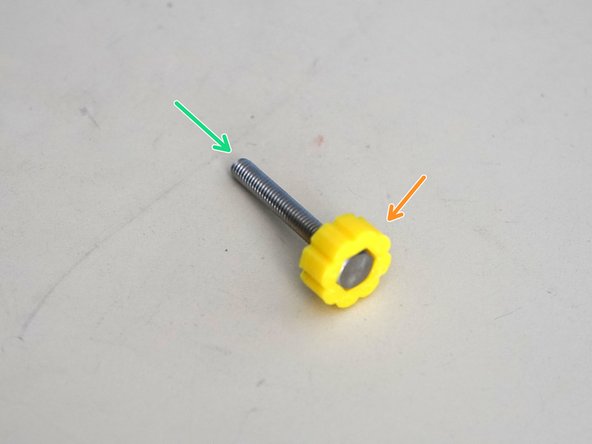
The M4x30 hex head screw.
-
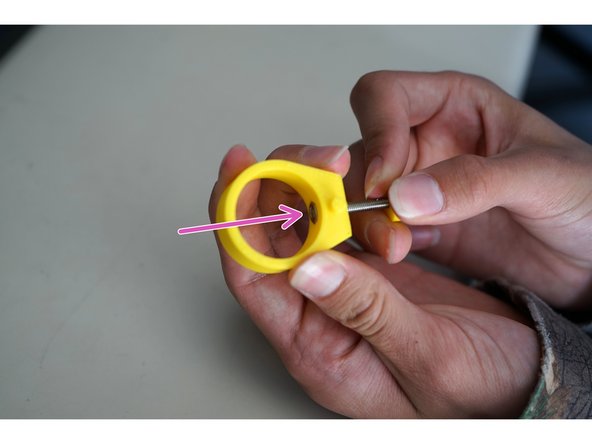
Press the tension screw assist onto the M4 screw.
-
Use the screw to pull the nut into the tensioner body until it is fully seated.
-
-
-
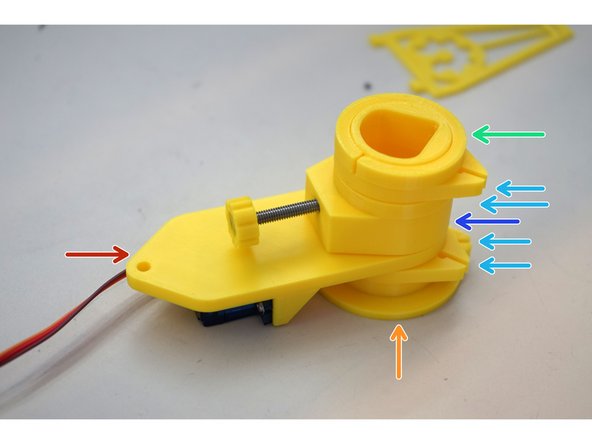
Put one pair of clips onto the center tube.
-
Put the servo mounting plate onto the tube, servo side down.
-
Put the tensioner onto the tube with the nub locking into the matching hole on the servo mounting plate.
-
Turn the center tube until the hole in the tube lines up with the tensioner screw. Turn the tensioner screw into the hole of the center tube.
-
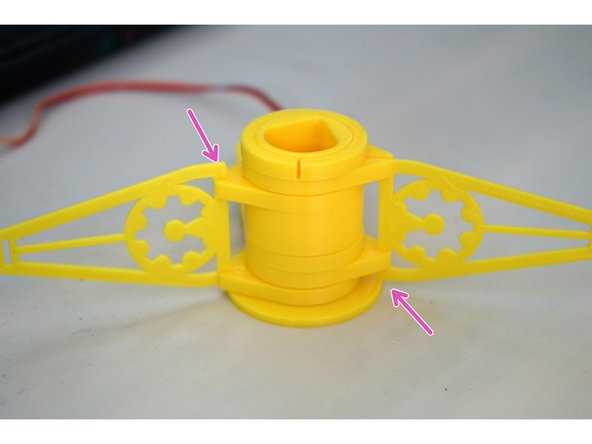
Add the other pair of clips, making sure the q-p holes are in the same order as the first pair of clips.
-
Snap the retaining ring on to the end of the assembly.
-
Attach the arms to the clips. They are turned 180 from each other.
-
-
-
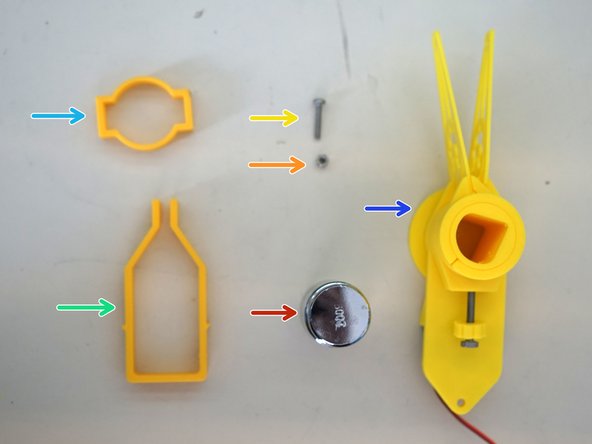
Gather the 200g weight
-
M3 nut
-
M3x15 screw
-
Weight holder
-
Weight retainer
-
and your previously assembled parts
-